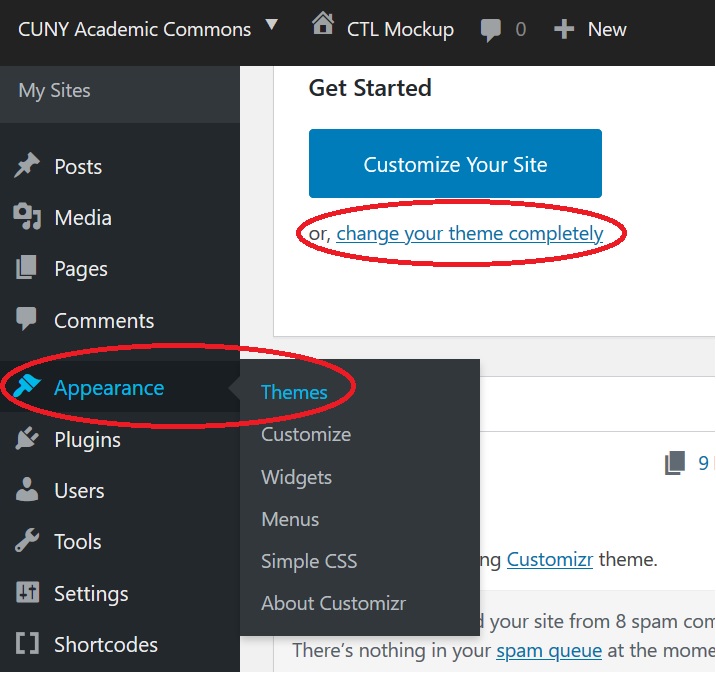
Selecting a theme is a great way to personalize the appearance of your course site.
Go to your dashboard by hovering over your site name on the upper left of the page and selecting “Dashboard” from the drop down menu.
Choose “Change your theme completely” or go to Appearance and choose “Themes.”
You can try a Live Preview before activating your theme.
Remember to Activate and Publish your chosen theme.
Pages+
Create Pages
You will now want to create pages for your website. If you selected the Default Template you will have two sample pages. If you selected the Teaching Template, you will have five existing pages: Home, Syllabus, Course Schedule, Resources, and posts. You can edit these pages, or add new ones.
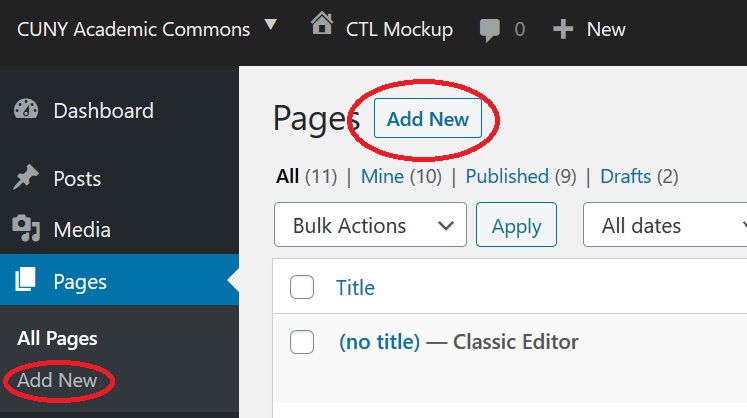
If you want to create your own home page or add another page such as one for assignments you will need to add pages.
Go to Pages, then All Pages, then Add New.
Give your new page a name, and add content if you are ready.
In Edit mode, you can enter text, add images, change the format of your pages, and add hyperlinks. You can copy and paste from completed work, or type directly on the page. You can change the visibility, which could be useful if you want to create a private page for discussions or copyright-protected work. You can create a page order if you want to assign a parent page to a sequence of pages connected to a larger topic.
Password Protect Pages
To create a password-protected page for your class, edit the page then,
Click “Visibility” in the Document section on the right side of the screen and select “Password Protected.”
Make sure to Update and Save.
Share the password with your class.
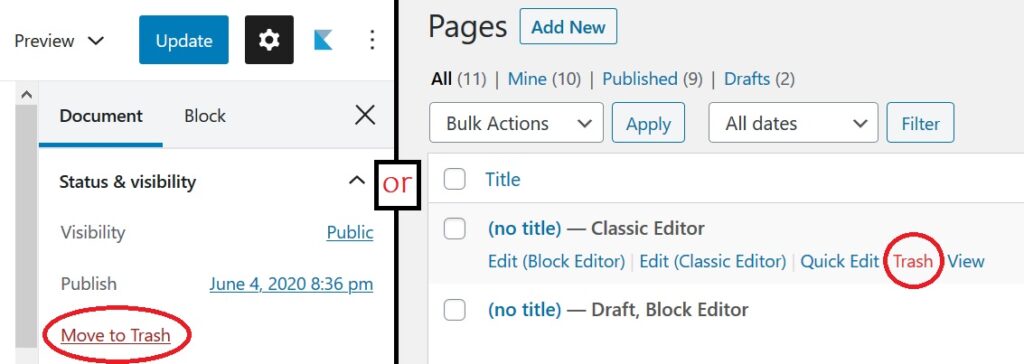
Delete Pages
You can delete pages by going to pages, editing the page you wish to delete, and clicking “Move to Trash” on the right-hand side of the screen.
OR
You can delete directly from the list of pages by hovering over the page you wish to delete, then clicking “Trash.”
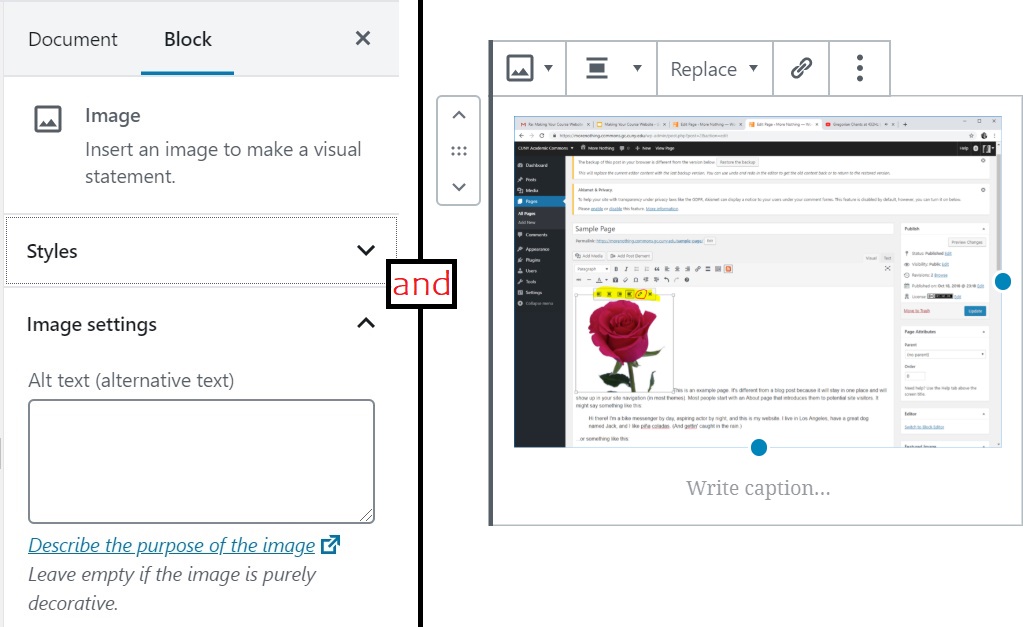
Add Images/Video
You can add images and videos to your pages if you wish. If you selected the Teaching Template, your Media Library comes stocked with a number of images. If you want to select specific images for your class, you might want to upload them to your Media Library first
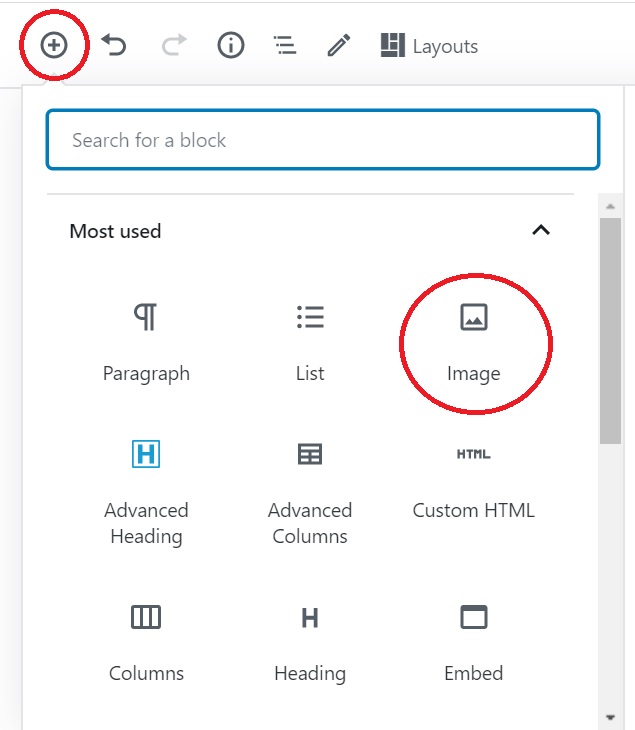
To add an image to a specific page, first, open that page.
Click the plus button in the top left corner of the page and search for/select “Image.”
Select the image from your Media Library, directly from your computer, or from a URL.
You can easily edit the alignment and size of images after inserting them from the menu on the right of the page, and from the menu that appears above the picture itself. You can return to edit images later by clicking on the image in edit mode on that page.
Remember to Update and save all your changes.
If you selected the Teaching Template, you will be prompted to Add Text or mark the image as Decorative. If you selected the Default Template you can add Alt Text or an image Description either through the edit image tool or immediately upon uploading the image. This helps students with vision-related issues. Making your site Accessible makes your content readable by students with certain disabilities such as tracking issues or vision impairment. CUNY Academic Commons is set up to ensure that most content is accessible.
Set a Home Page
The default for most newly created webpages using the Default Template is for the home page to be a blog roll, showing the newest posts. You will want to change the home page settings to a “static home page” In the Dashboard, go to Settings, then Reading, then select, “Your homepage displays “A static page.” From here you can select the page you wish to display as your home page. Many course sites use the syllabus page as the home page.
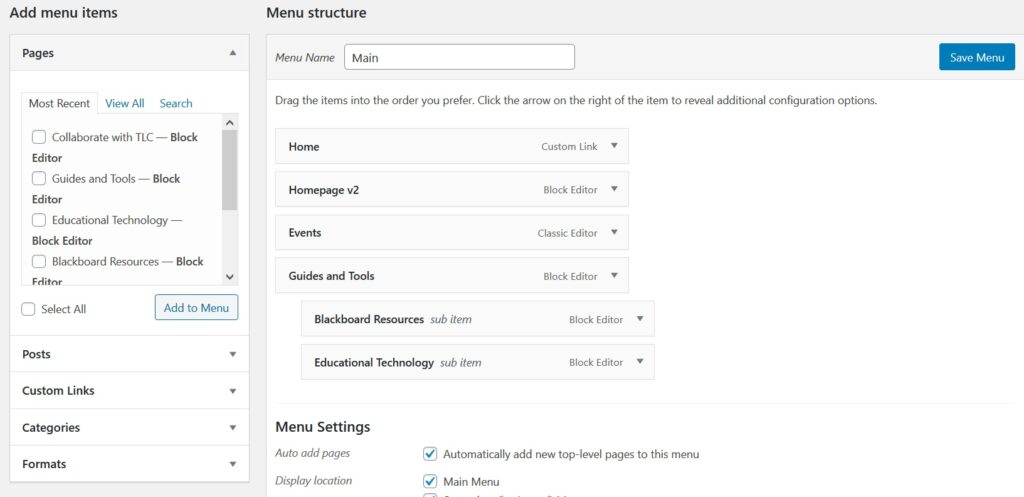
Menus+
Menus are an important part of making your webpage navigable by your students. Create a menu for your pages to keep them in order and allow you to make easy changes to your sequence.
Go to Appearance and then Menus.
Add or delete any pages to your menu.
Drag pages to preferred order.
Remember to save your menu.
In the “Manage Locations” tab, Assign your newly created menu as Primary (may say “Main Menu” depending on your theme).
Always remember to save changes.
To be fully accessible:
All items on the home page should be fully e-reader friendly
All clickable items should contain a description on the first page that opens
If you have a drop-down menu, you should also have all the information available on the first page open.
The first page to open from the home page can explain that there is a drag-down menu
All text and images on Commons websites should be e-reader friendly.
PDFs created by you should be e-reader friendly. PDFs made by copying pages on a scanner are not always readable.
Plugins
Plugins are additional features that you can add to your course pages to increase their interactivity. There are many plugins to choose from. The most useful plugin is the PDF embedder, which allows you to post PDF content on your pages. BBPress is another useful plugin, particularly if you want to hold online forums or discussions on your class website.
Go to Plugins, then Installed Plugins, then search for the plugin you wish to install.
Click “Activate” beneath the plugin name.
It should now appear in your list of Installed Plugins and be available for use on your website.
Customizing a Course Site
tlc@ccny.cuny.edu
Need help with the Commons?
Email us at commonshelpsite@gmail.com so we can respond to your questions and requests. Please email from your CUNY email address if possible. Or visit our help site for more information: